

Have you ever published a new version of your website to Azure Web Apps, but then no changes appear on the site? It might help to take a look into the server's files. But how do you get to them? Read more to find out.
First method - Easiest (Windows server only)
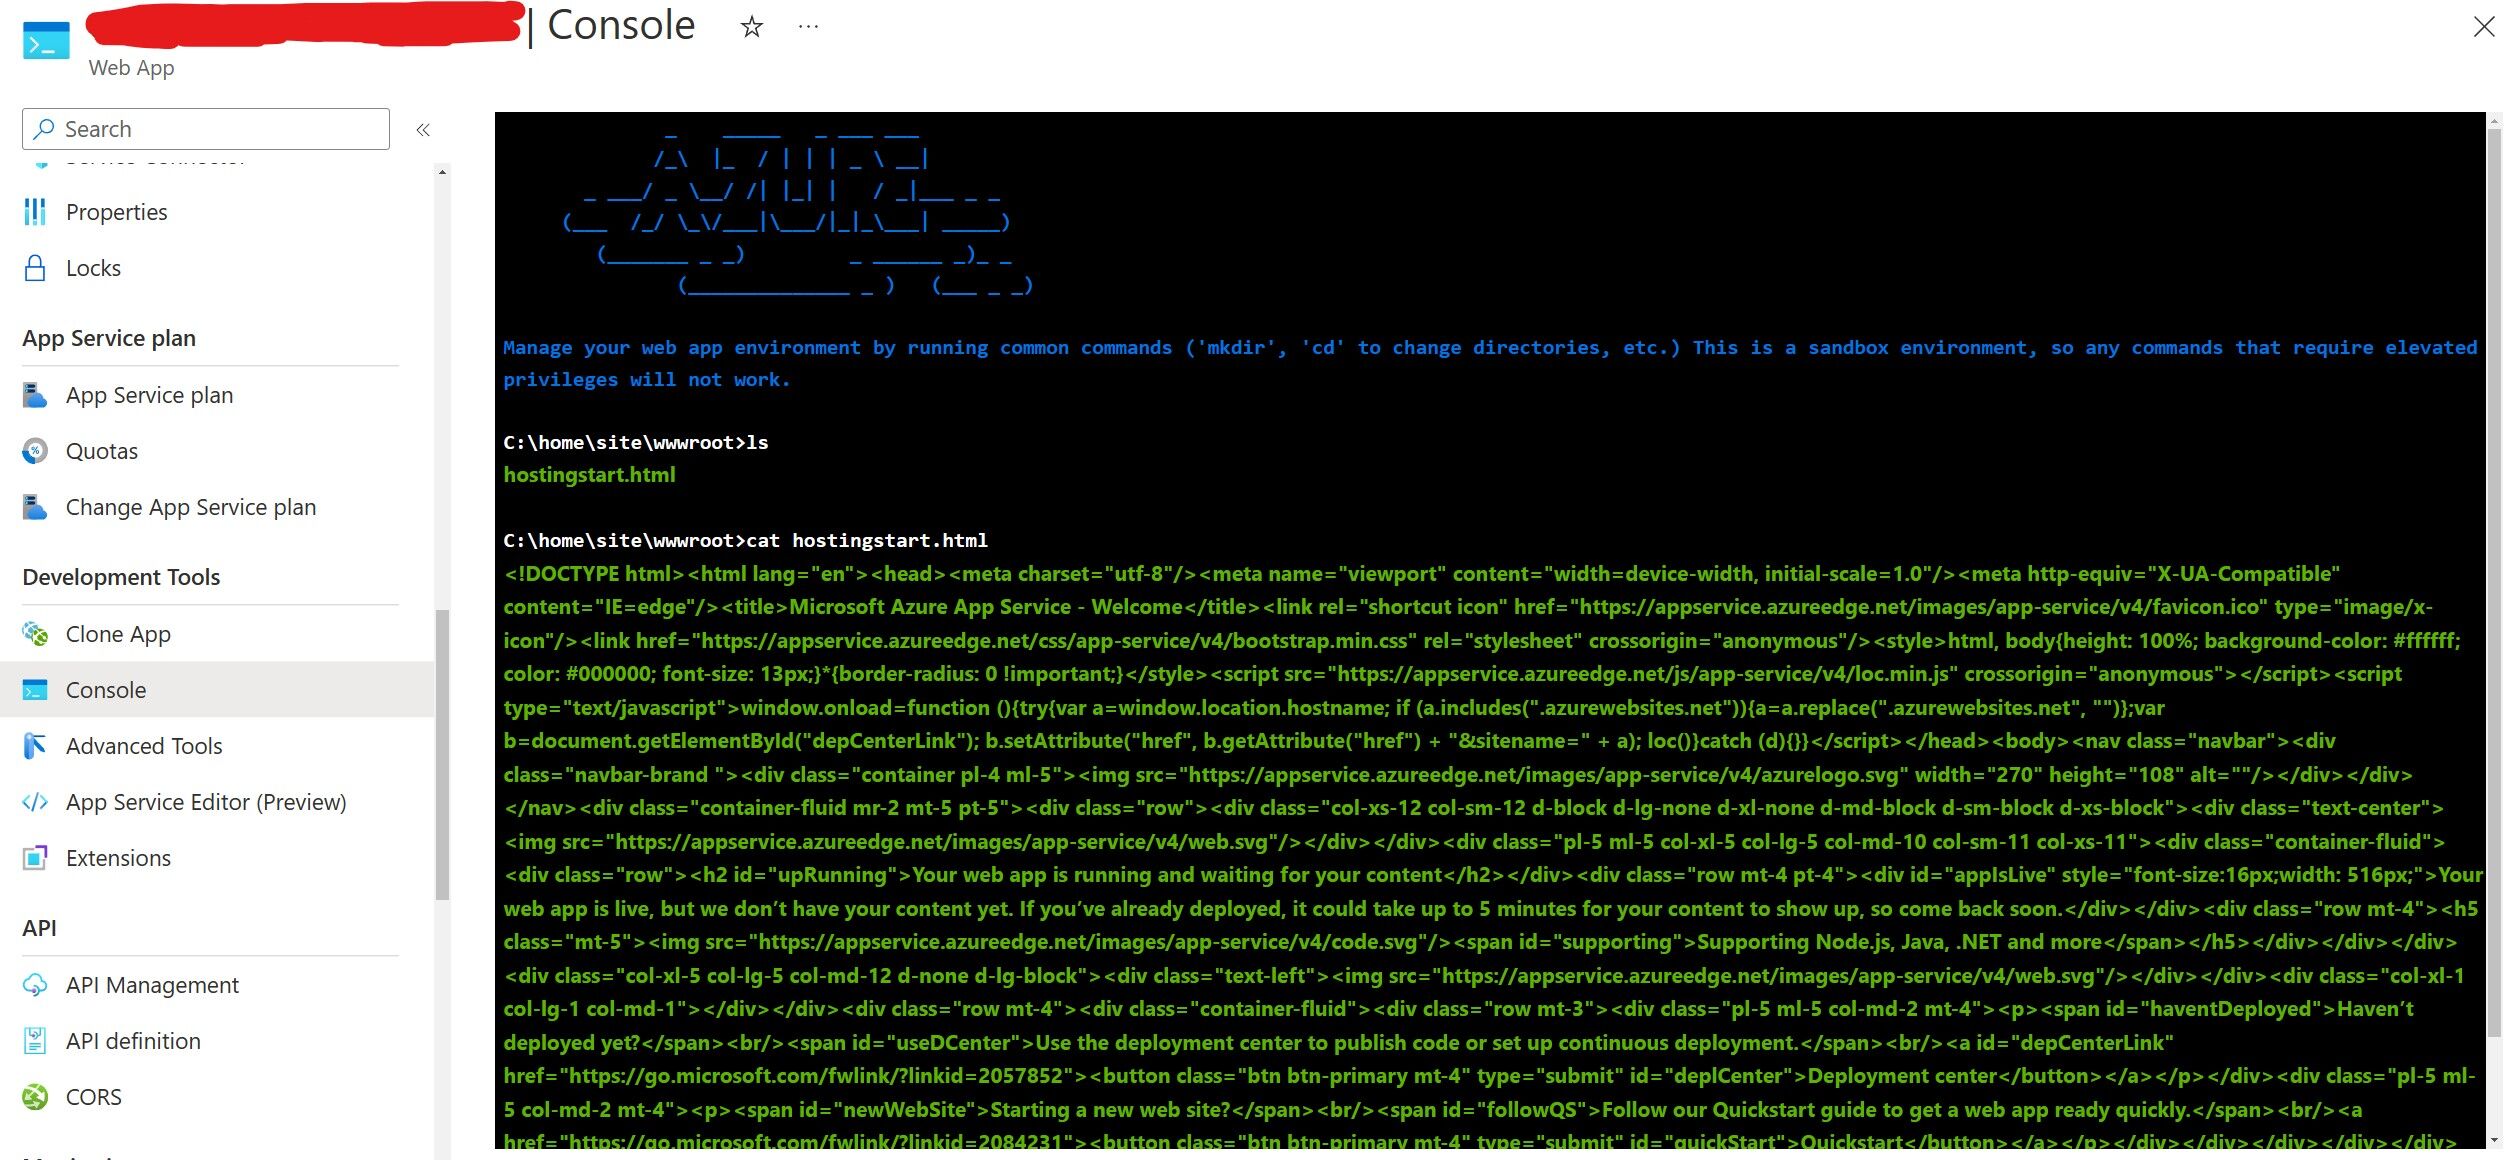
If your Azure Web App runs on Windows, I have good news for you! You simply have to go into your Web App settings, scroll for a bit and under the Development Tools section, you should find Console list item.

As far as I know, this setting tab should be available for all windows-server-hosted web apps, no matter the hosting tier. If you decide to click that setting, you'll be greeted with a simple console already connected to your Web App, right there in Azure.
Prerequisites for the following two methods
- Have an Azure Web App with some files
- Download your Azure Web App's publish profile
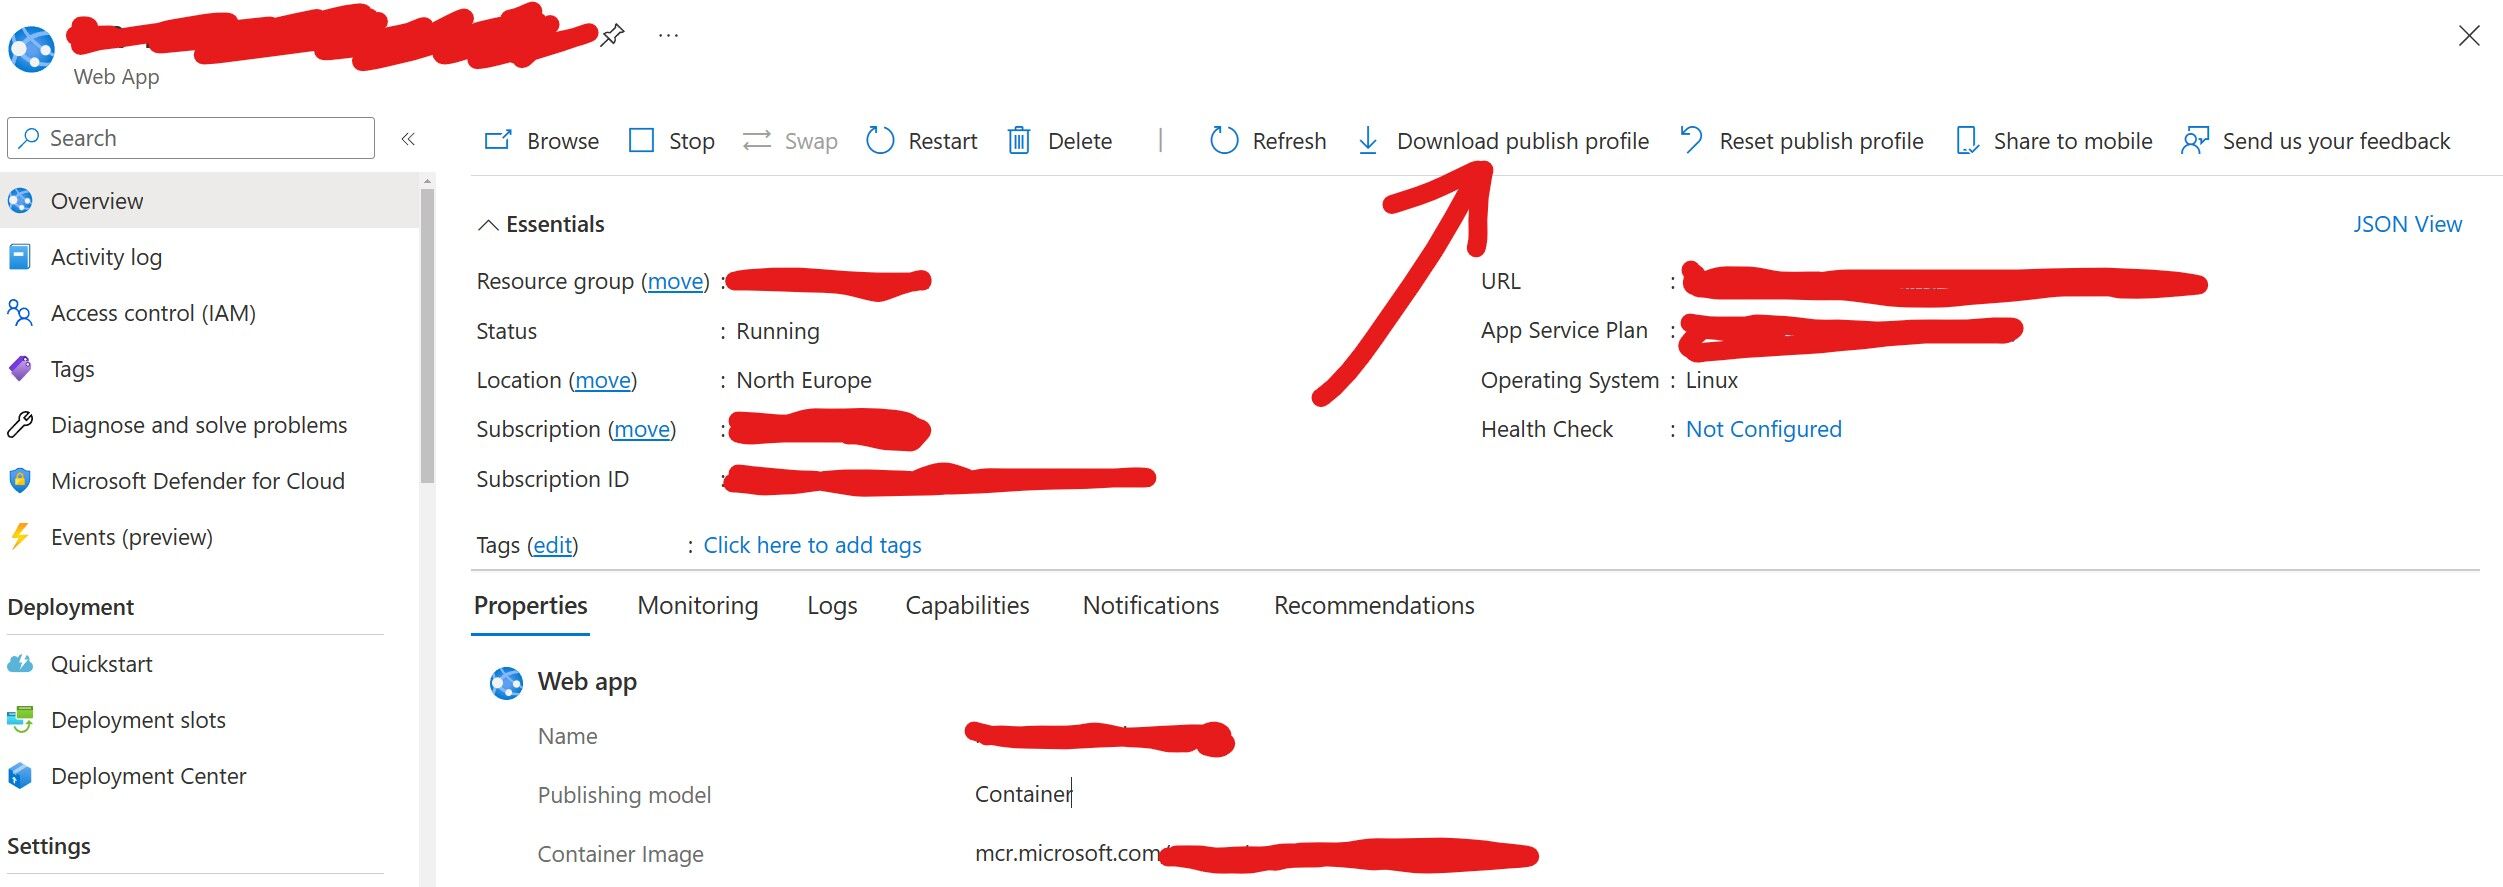
Location of the 'Download publish profile' button
Second method - secure (FTPS)
Prerequisites:
- Check you have
lftpCLI available.
Since you're already reading this, friendly reminder to make sure that your Azure Web App is setup correctly to only accept FTPS connections:

Everything ready? Great! First of all, retrieve information from your Publish profile. You should look for for the following tag:
<publishProfile profileName="{your_resource_name} - FTP">Once you've found this tag, save somewhere it's following properties: publishUrl, userName, userPWD. And that's it. We're now, ready to jump into terminal
and use following commands:
> lftp
lftp :~> set ftp:ssl-force true;
lftp :~> set ftp:ssl-protect-data true;
lftp :~> set ssl:verify-certificate true;
lftp :~> set ftp:ssl-protect-data true;
lftp :~> open {enter publishUrl without the ftp:// part at the beginning and /site/wwwroot at the end}
lftp :~> user {enter userName} {enter userPWD}
lftp :~> ls
lftp :~> cd /site/wwwroot
lftp :~> ls
After you've followed the steps above, you should be able to navigate through and explore the directories of your Azure Web App.
Third method - insecure (FTP)
Prerequisites:
- Check you have
ftpCLI available.
I recommend using this method as a last possible option, because the communication protocol used is unencrypted (FTP). Make sure to only use this on networks you fully trust. After you're done with this method, you should probably go into Azure and disable this kind of access (as shown in the second method above).
First of all, retrieve information from your Publish profile. You should look for for the following tag:
<publishProfile profileName="{your_resource_name} - FTP">Once you've found this tag, save somewhere it's following properties: publishUrl, userName, userPWD. And that's it. We're now, ready to jump into terminal
and use following commands:
> ftp
ftp> open
(to) {enter publishUrl without the ftp:// part at the beginning and /site/wwwroot at the end}
Name: {enter userName}
Password: {enter userPWD}
ftp> passive
ftp> ls
ftp> cd /site/wwwroot
ftp> ls
After you've followed the steps above, you should be able to navigate through and explore the directories of your Azure Web App.
I hope you enjoyed this article/blog post!
If you have any questions, problems or want to start a discussion, don't hesitate and write me an email!